Wireless Debugging စနစ်
Wireless Debugging စနစ် ကို အသုံးပြုနိုင်ရန် ချိတ်မည့်စက်သည် Android 11 နှင့် အထက် ရှိရပါမည်။ Developer options ထဲတွင်လည်း Wireless debugging ပါရပါမည်။
အဆင့် ၁။ USB Debugging ကို ဖွင့်ပါ
ချိတ်မည့်စက်တွင် USB debugging ကို ဖွင့်ရပါမည်။ အသေးစိတ်ကို USB Debugging ဘယ်လိုဖွင့်ရမလဲ? တွင် ကြည့်ရှုပါ။
အဆင့် ၂။ Wireless debugging ကို ဖွင့်ပါ
ချိတ်မည့်စက်တွင် Developer options ထဲမှ Wireless debugging ကို ဖွင့်ပါ။ "Allow wireless debugging on this network?" ဆိုတဲ့ dialog ပြလျှင် Always allow on this network ကို အမှန်ခြစ် ခြစ်ပြီး OK ကို နှိပ်ပါ။ ပြီးလျှင် ပြန်ဖွင့်ပါ။
ပြီးလျှင် Pair with pairing code ကို နှိပ်ပါ။
အဆင့် ၃။ လိုအပ်သော နေရာများကို ဖြည့်ပါ
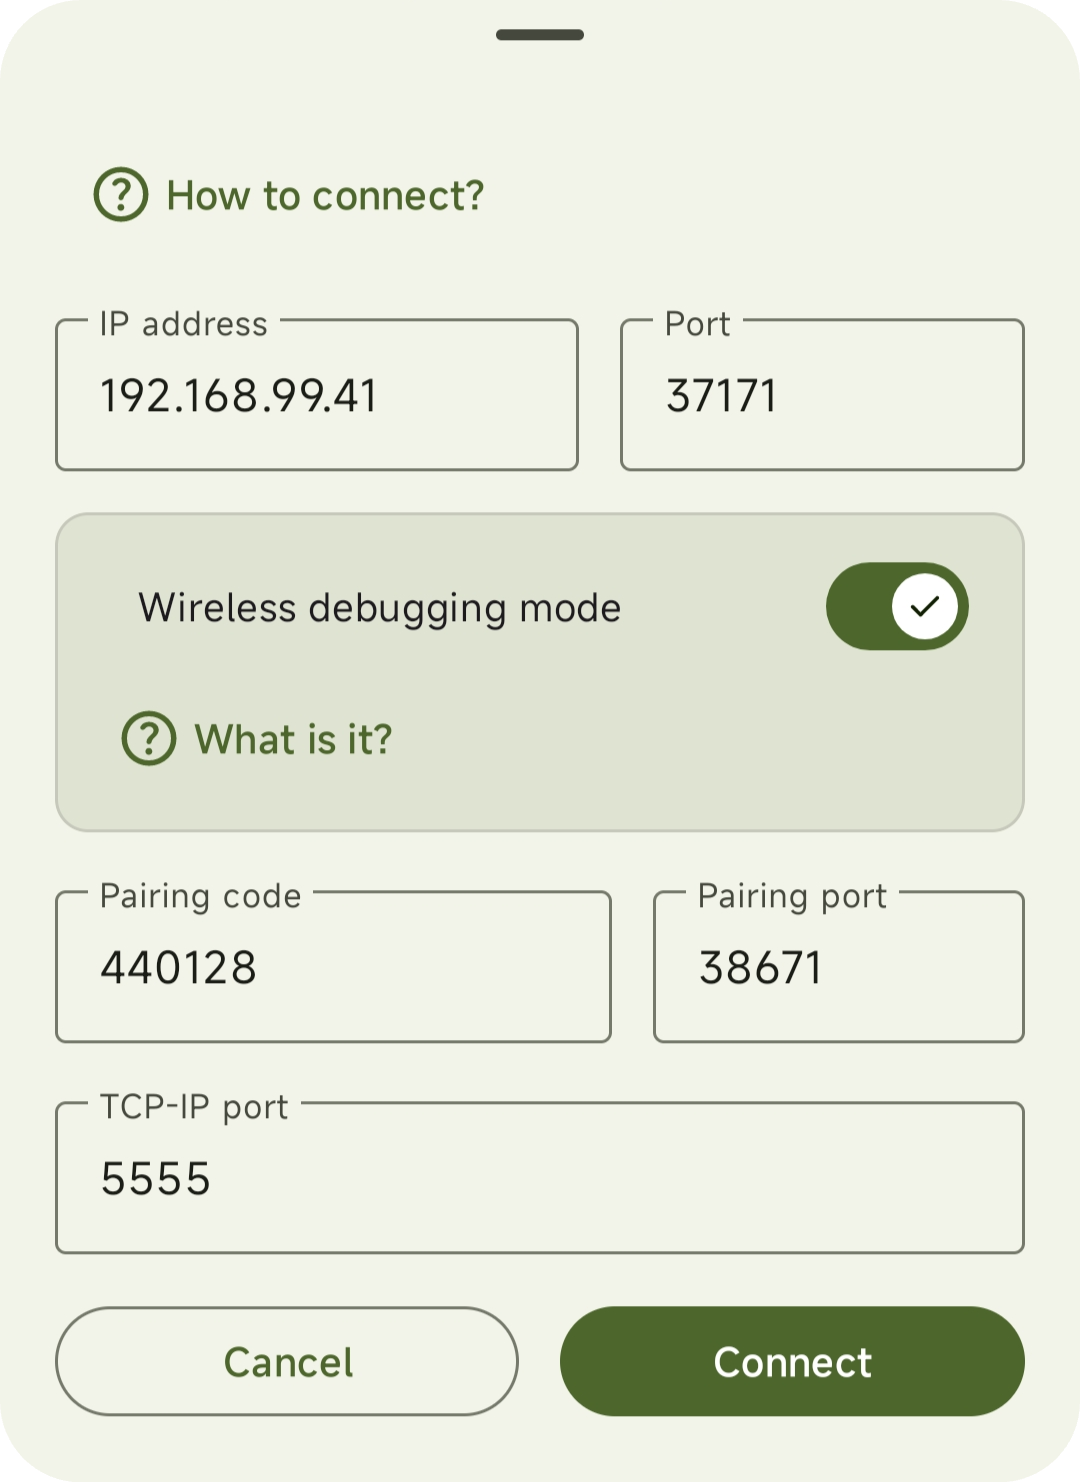
- ဖုန်းတွင် ADB Remote app ကို ဖွင့်ပြီး Wireless debugging mode ကို ဖွင့်ပါ။
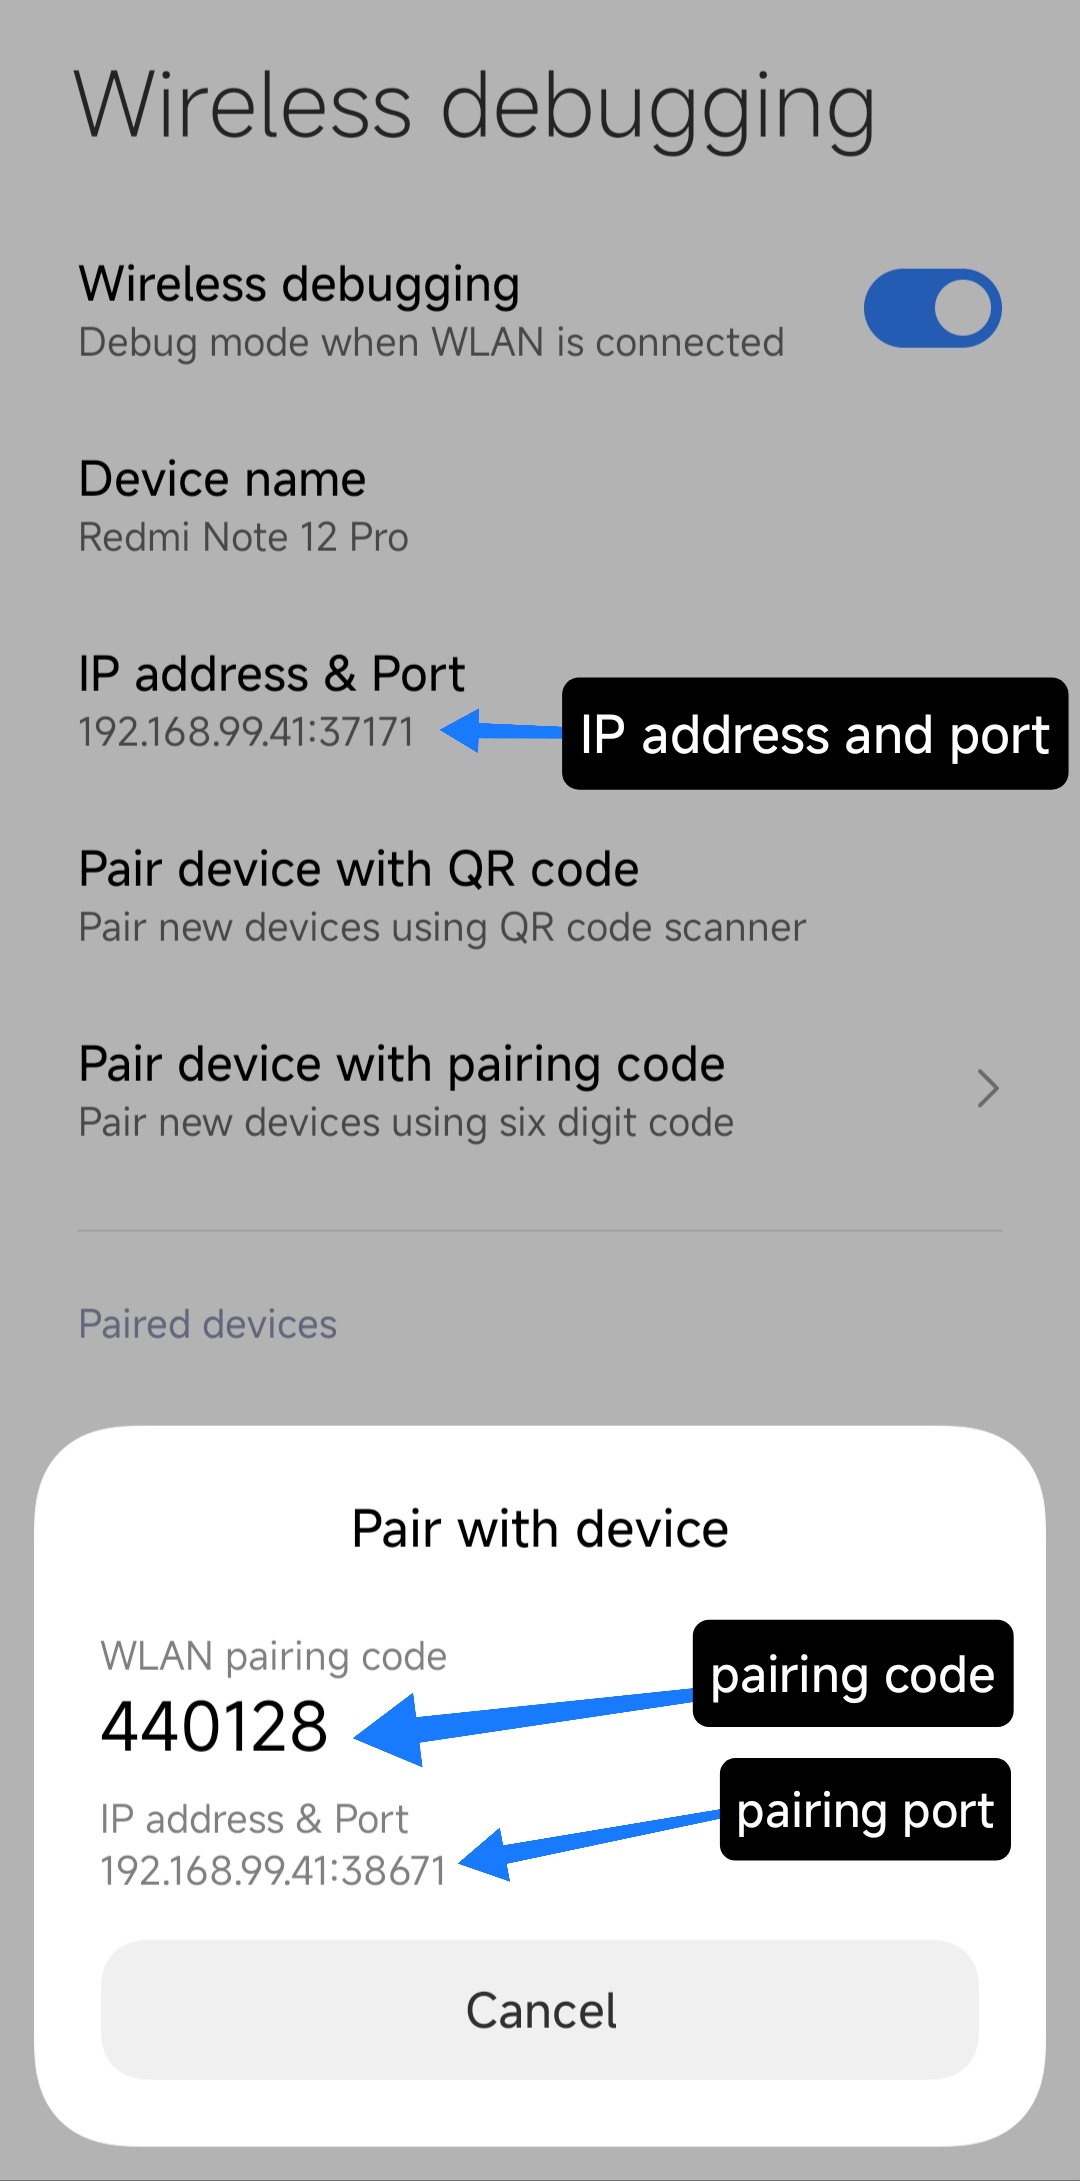
- IP address နှင့် port နေရာတွင် ပုံထဲမှာ ပြထားသည့်အတိုင်း ထည့်ပါ။
- Pairing code နှင့် pairing port များကိုလည်း ပုံထဲမှာ ပြထားသည့်အတိုင်း ထည့်ပါ။
- TCP-IP port ကို မူလအတိုင်း 5555 သာ ထားပါ။ ပြီးလျှင် Connect ခလုတ်ကို နှိပ်ပါ။
မှတ်ချက်
error: device offline ဟု ပေါ်လာလျှင် အဆင့် ၁ မှ ပြန်စပြီး ချိတ်ပါ။